Guides
Creating a Simple Email Newsletter with Content Notify
So, you publish content on your website and you want to let the people that use your site know when you publish it. You may want them to sign up to email alerts for any kind of content, letting them select the exact category, tag, or keyword they want to be notified about. Or you may only want them to sign-up for when a specific type of content is published, such as blog posts, or new movie reviews.
There are lots of different ways you could do this, albeit with much less granularity: RSS to email, an integration between your WordPress site and a newsletter service (such as Mailchimp), or manual adding email addresses to a mailing list. If you like the idea of keeping things simple though, with everything stored on your website, and managing your subscribers and newsletter sign-up forms directly from your WordPress Admin, you may want to try Content Notify.
In this guide, we’ll go through how to create a super simple newsletter sign-up form, using Content Notify, where your users/visitors/members can sign-up to your content, manage their own email subscriptions, and choose when they receive it. Let’s get started.
Purchase & Install
The first thing you’ll want to do is purchase a license for Content Notify. Once you have this, you’ll want to install it like any other downloaded plugin by going to WP Admin > Plugins > Add New Plugin > Upload Plugin > Browse to the zip file of the plugin you downloaded from your Purchase Confirmation email > Install Now, and then once installed, click Activate Plugin.
Once installed, you’ll see a new menu in the WP Admin Sidebar called ‘Subscriptions’. You can feel free to make your way through Subscriptions > Settings at this point to set-up a few things if you wish, or you can head to Subscriptions > All Forms, where we’ll build our newsletter sign-up form. Click ‘Add New Subscription Form’ to open the form builder.
Building Your Newsletter Form
The form builder may look daunting, possibly even bland, but it’s actually not that complicated. Each of the toggles will enable or disable a particular form field and new options will appear depending on which ones are toggled. For the purposes of our simple newsletter form, we only want to show a couple of fields: name, email address, and (if required) alert frequency. However, becuase Content Notify is so flexible, we need to do a little bit of setup to whittle down the available options that our potential subscribers will see.
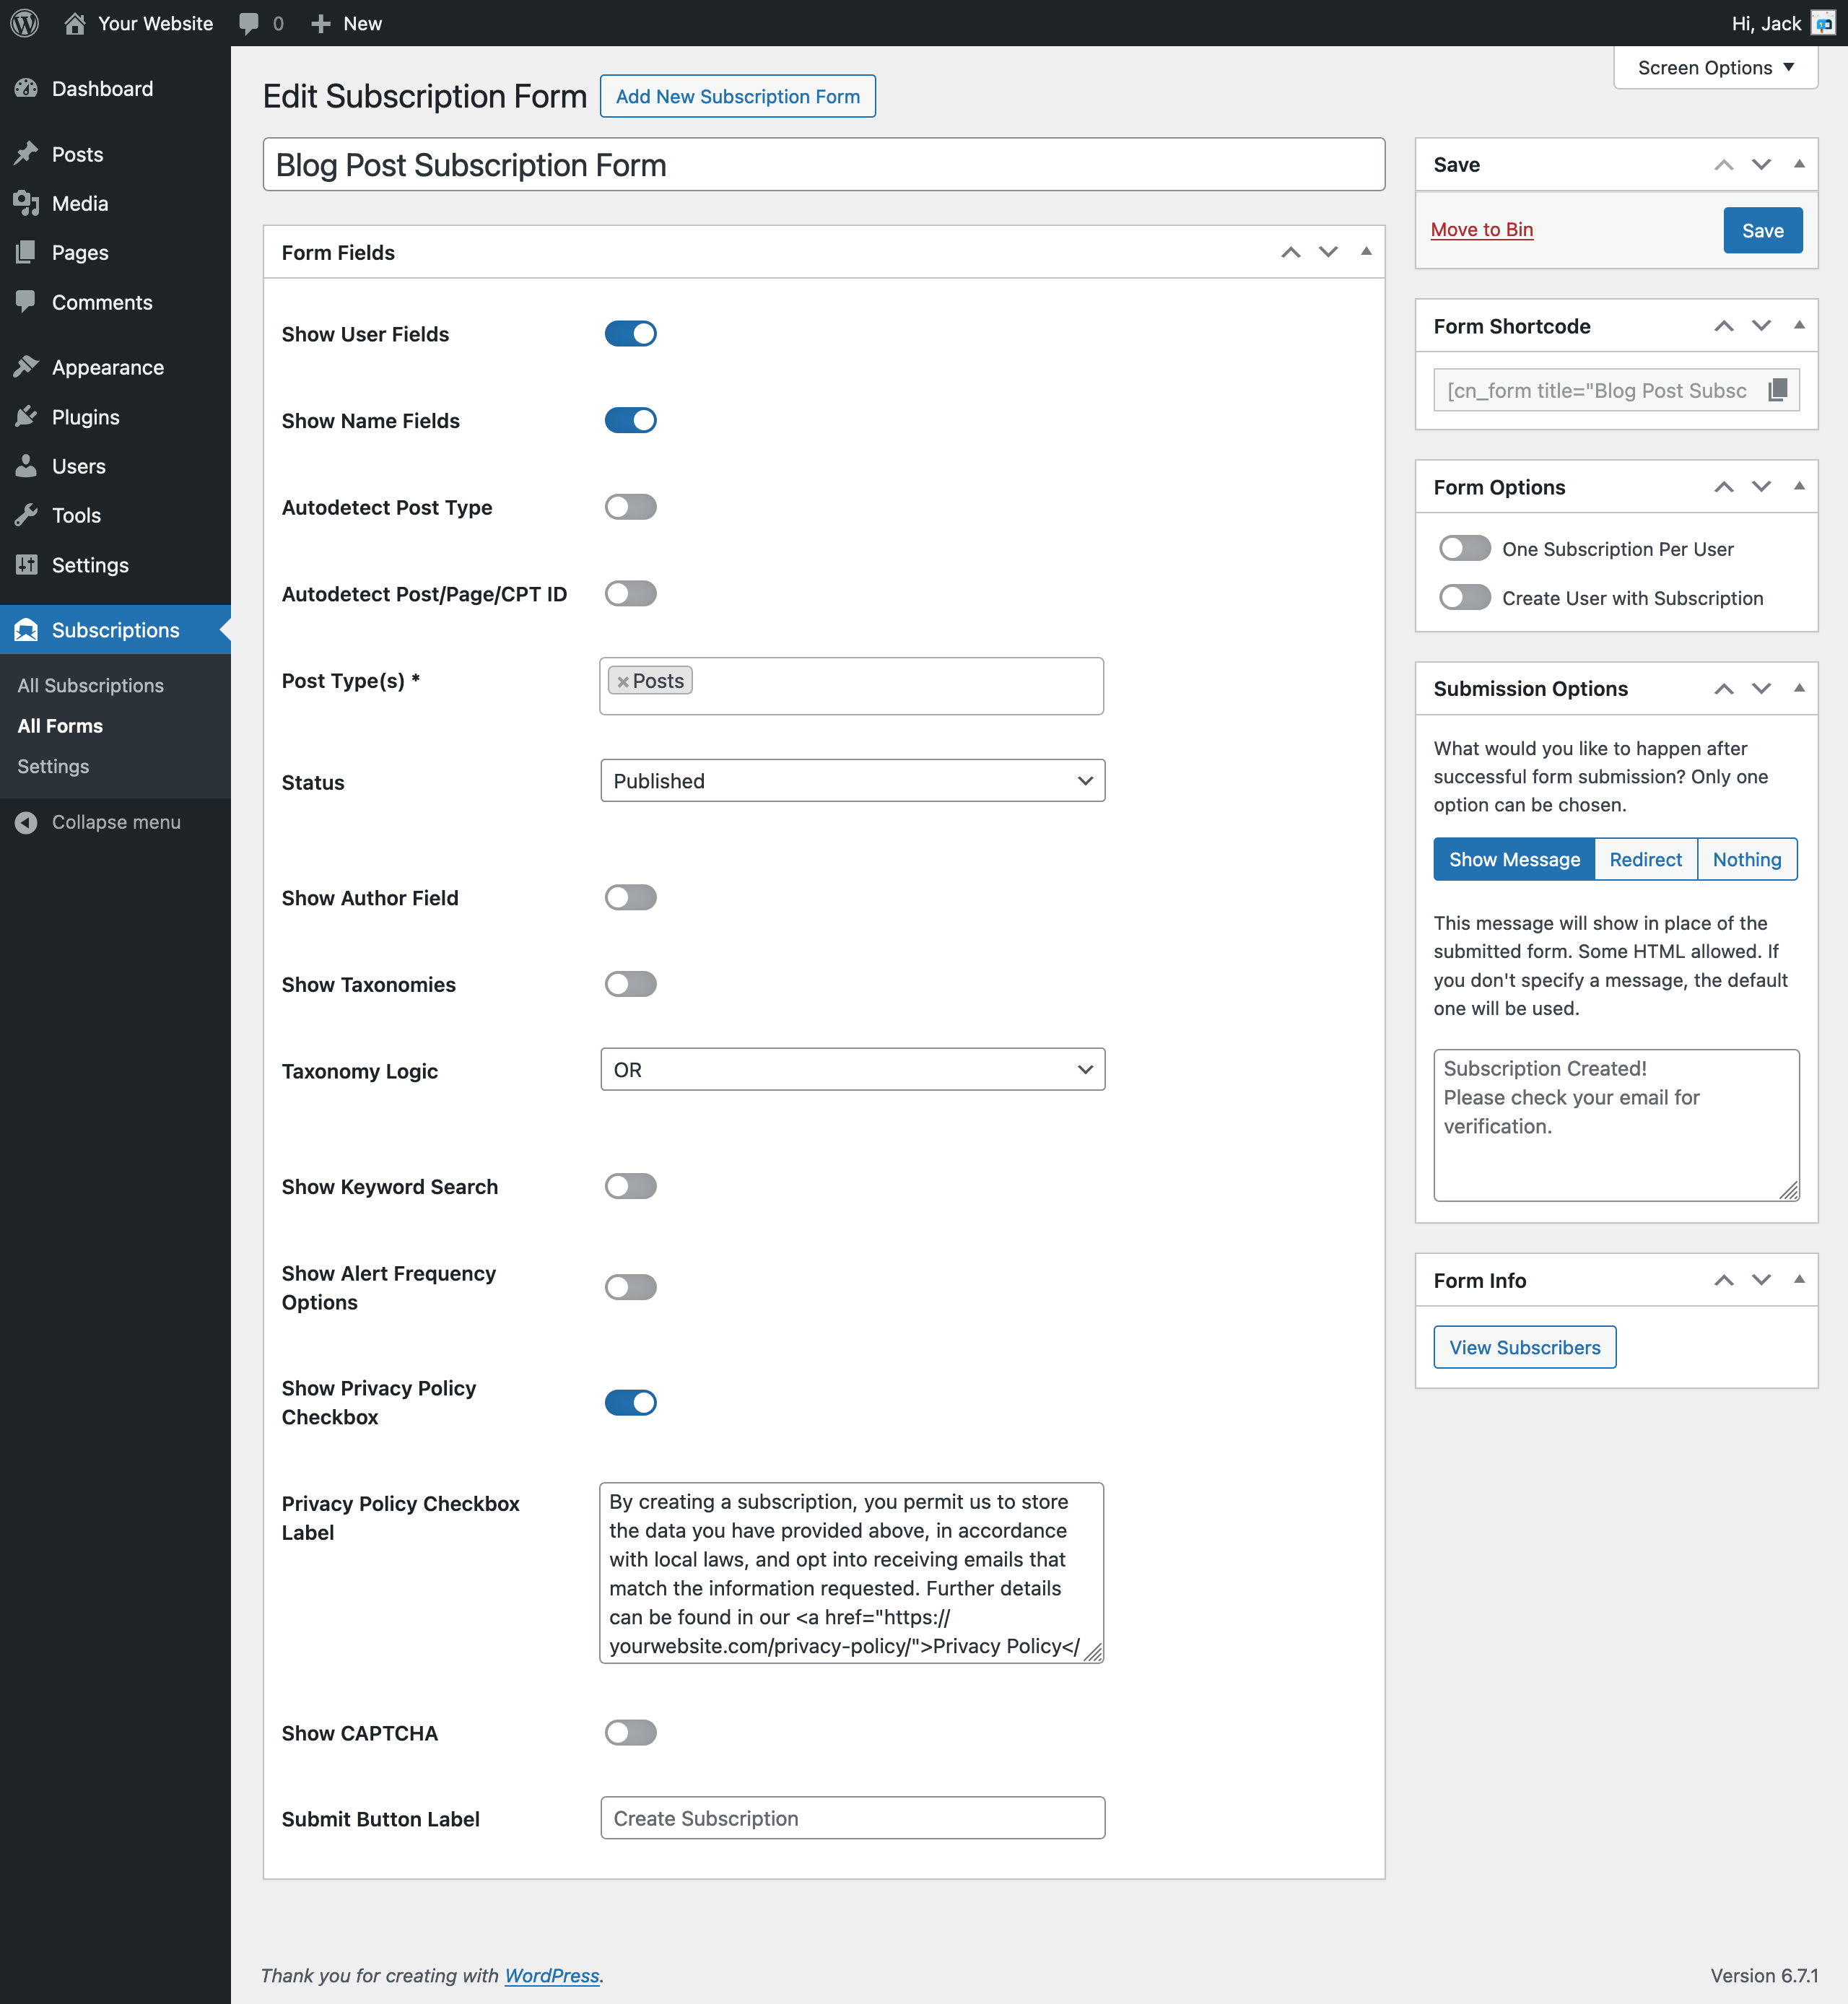
Feel free at this point to toggle fields on and off and have a play with the various fields. If you don’t fancy that at the moment and just want to carry on with our basic newsletter sign up form, simply follow the steps below.
Ensure the following fields are enabled (the toggle should be blue):
- Show User Fields
- Show Name Fields
- Show Alert Frequency Options (optional)
- Show Privacy Policy Checkbox
Everything else can be safely disabled.
To explain what we’re doing here, we are ensuring that the email address (user fields) and name fields are visible, we’re showing a field that allows the visitor to choose when they want to receive email alerts (immediately, daily, weekly, or monthly) but this is optional if you want an even smaller form, and we’re ensuring a checkbox with accompanying explaination of the website’s privacy policy can be shown.
If the user is registered and logged into the website then the user fields and name fields will be pre-populated and you can choose to show or not show the privacy checkbox at all as they may have agreed to it on registration however, if they’re not logged in, these fields are shown regardless to ensure as much compliance with the various email sign-up legislations around the world as possible. You can customise the Privacy Policy checkbox label if you like though.
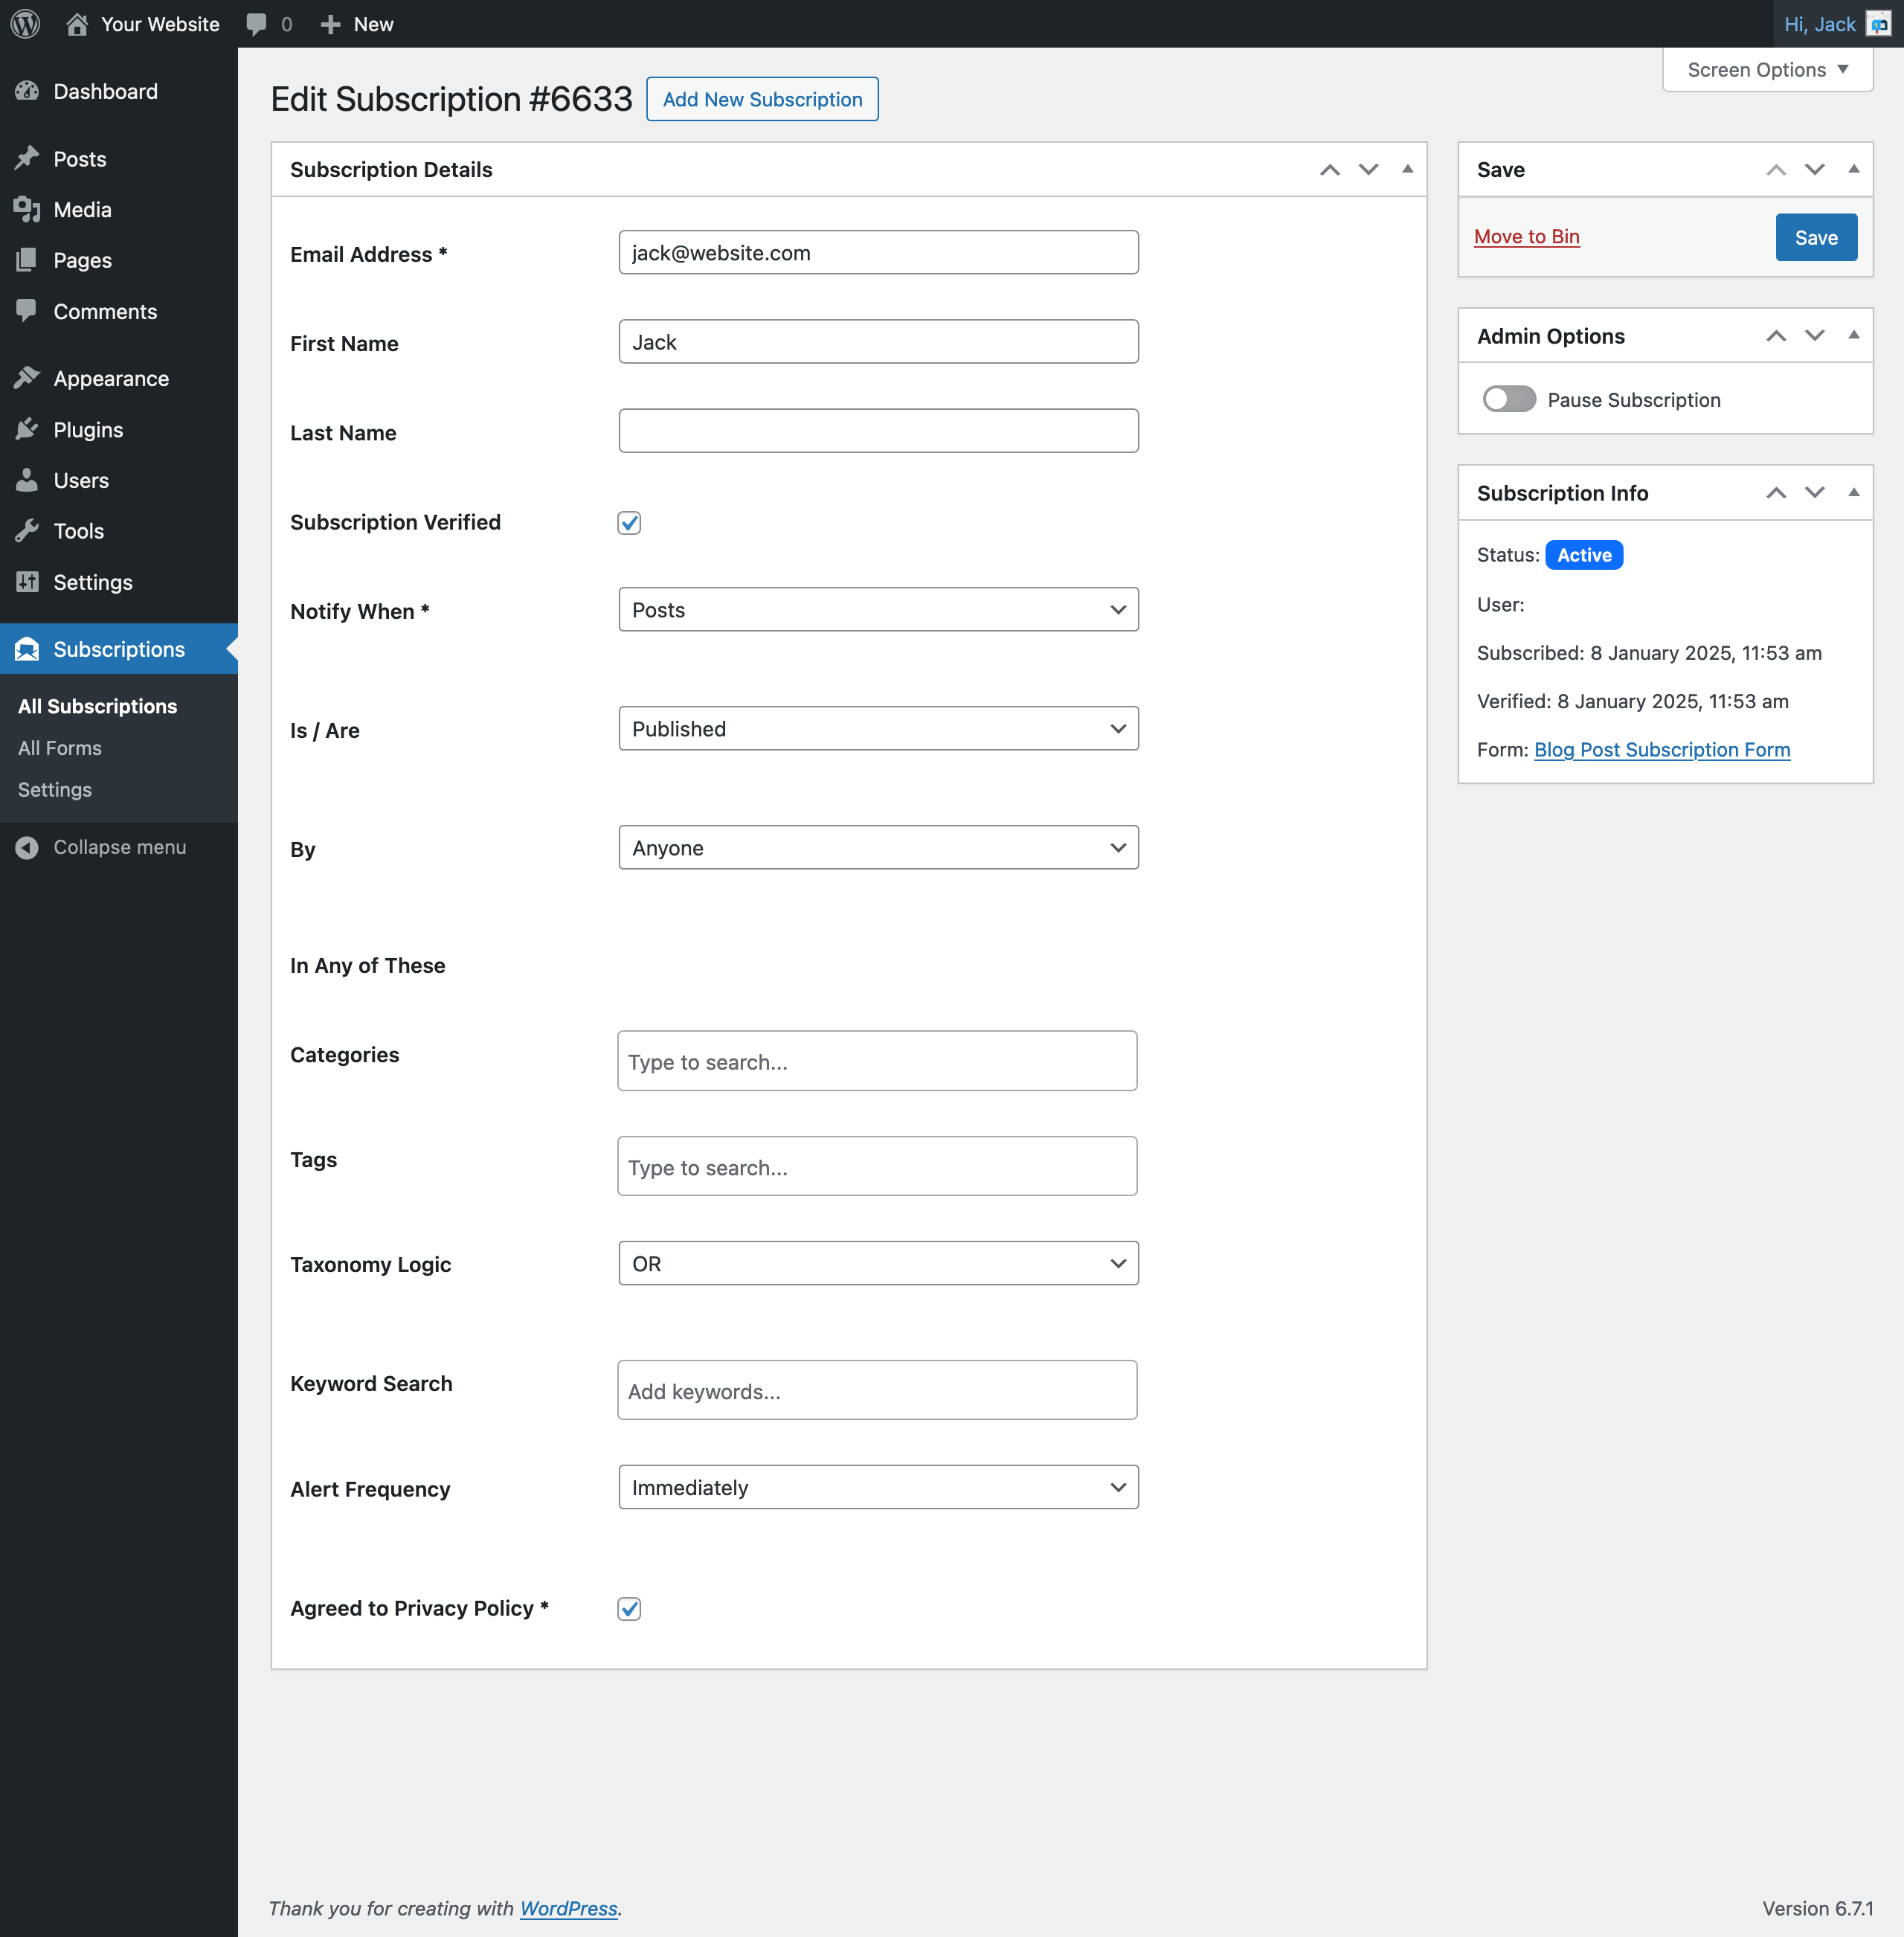
Moving forward, we then need to set a few more options relating to what type of content you’d like the newsletter sign-up form to create subscriptions for. If you’re being really fancy, you could use a custom post type here, such as ‘Newsletters’ which you can set up easily using another plugin, and publish content to that. For this tutorial, we’re going to focus on ‘Posts’ though.
Choose your content type and status:
- Choose ‘Posts’ from the ‘Post Type’ field.
- Choose ‘Published’ as the ‘Status’.
You can choose multiple post types to allow for more choice however, to keep our form as simple as possible, this guide focuses on a single post type.
The status could be Published, or Updated, or both, but for this guide, we only want to let subscribers receive email alerts about new posts.
You’re done!
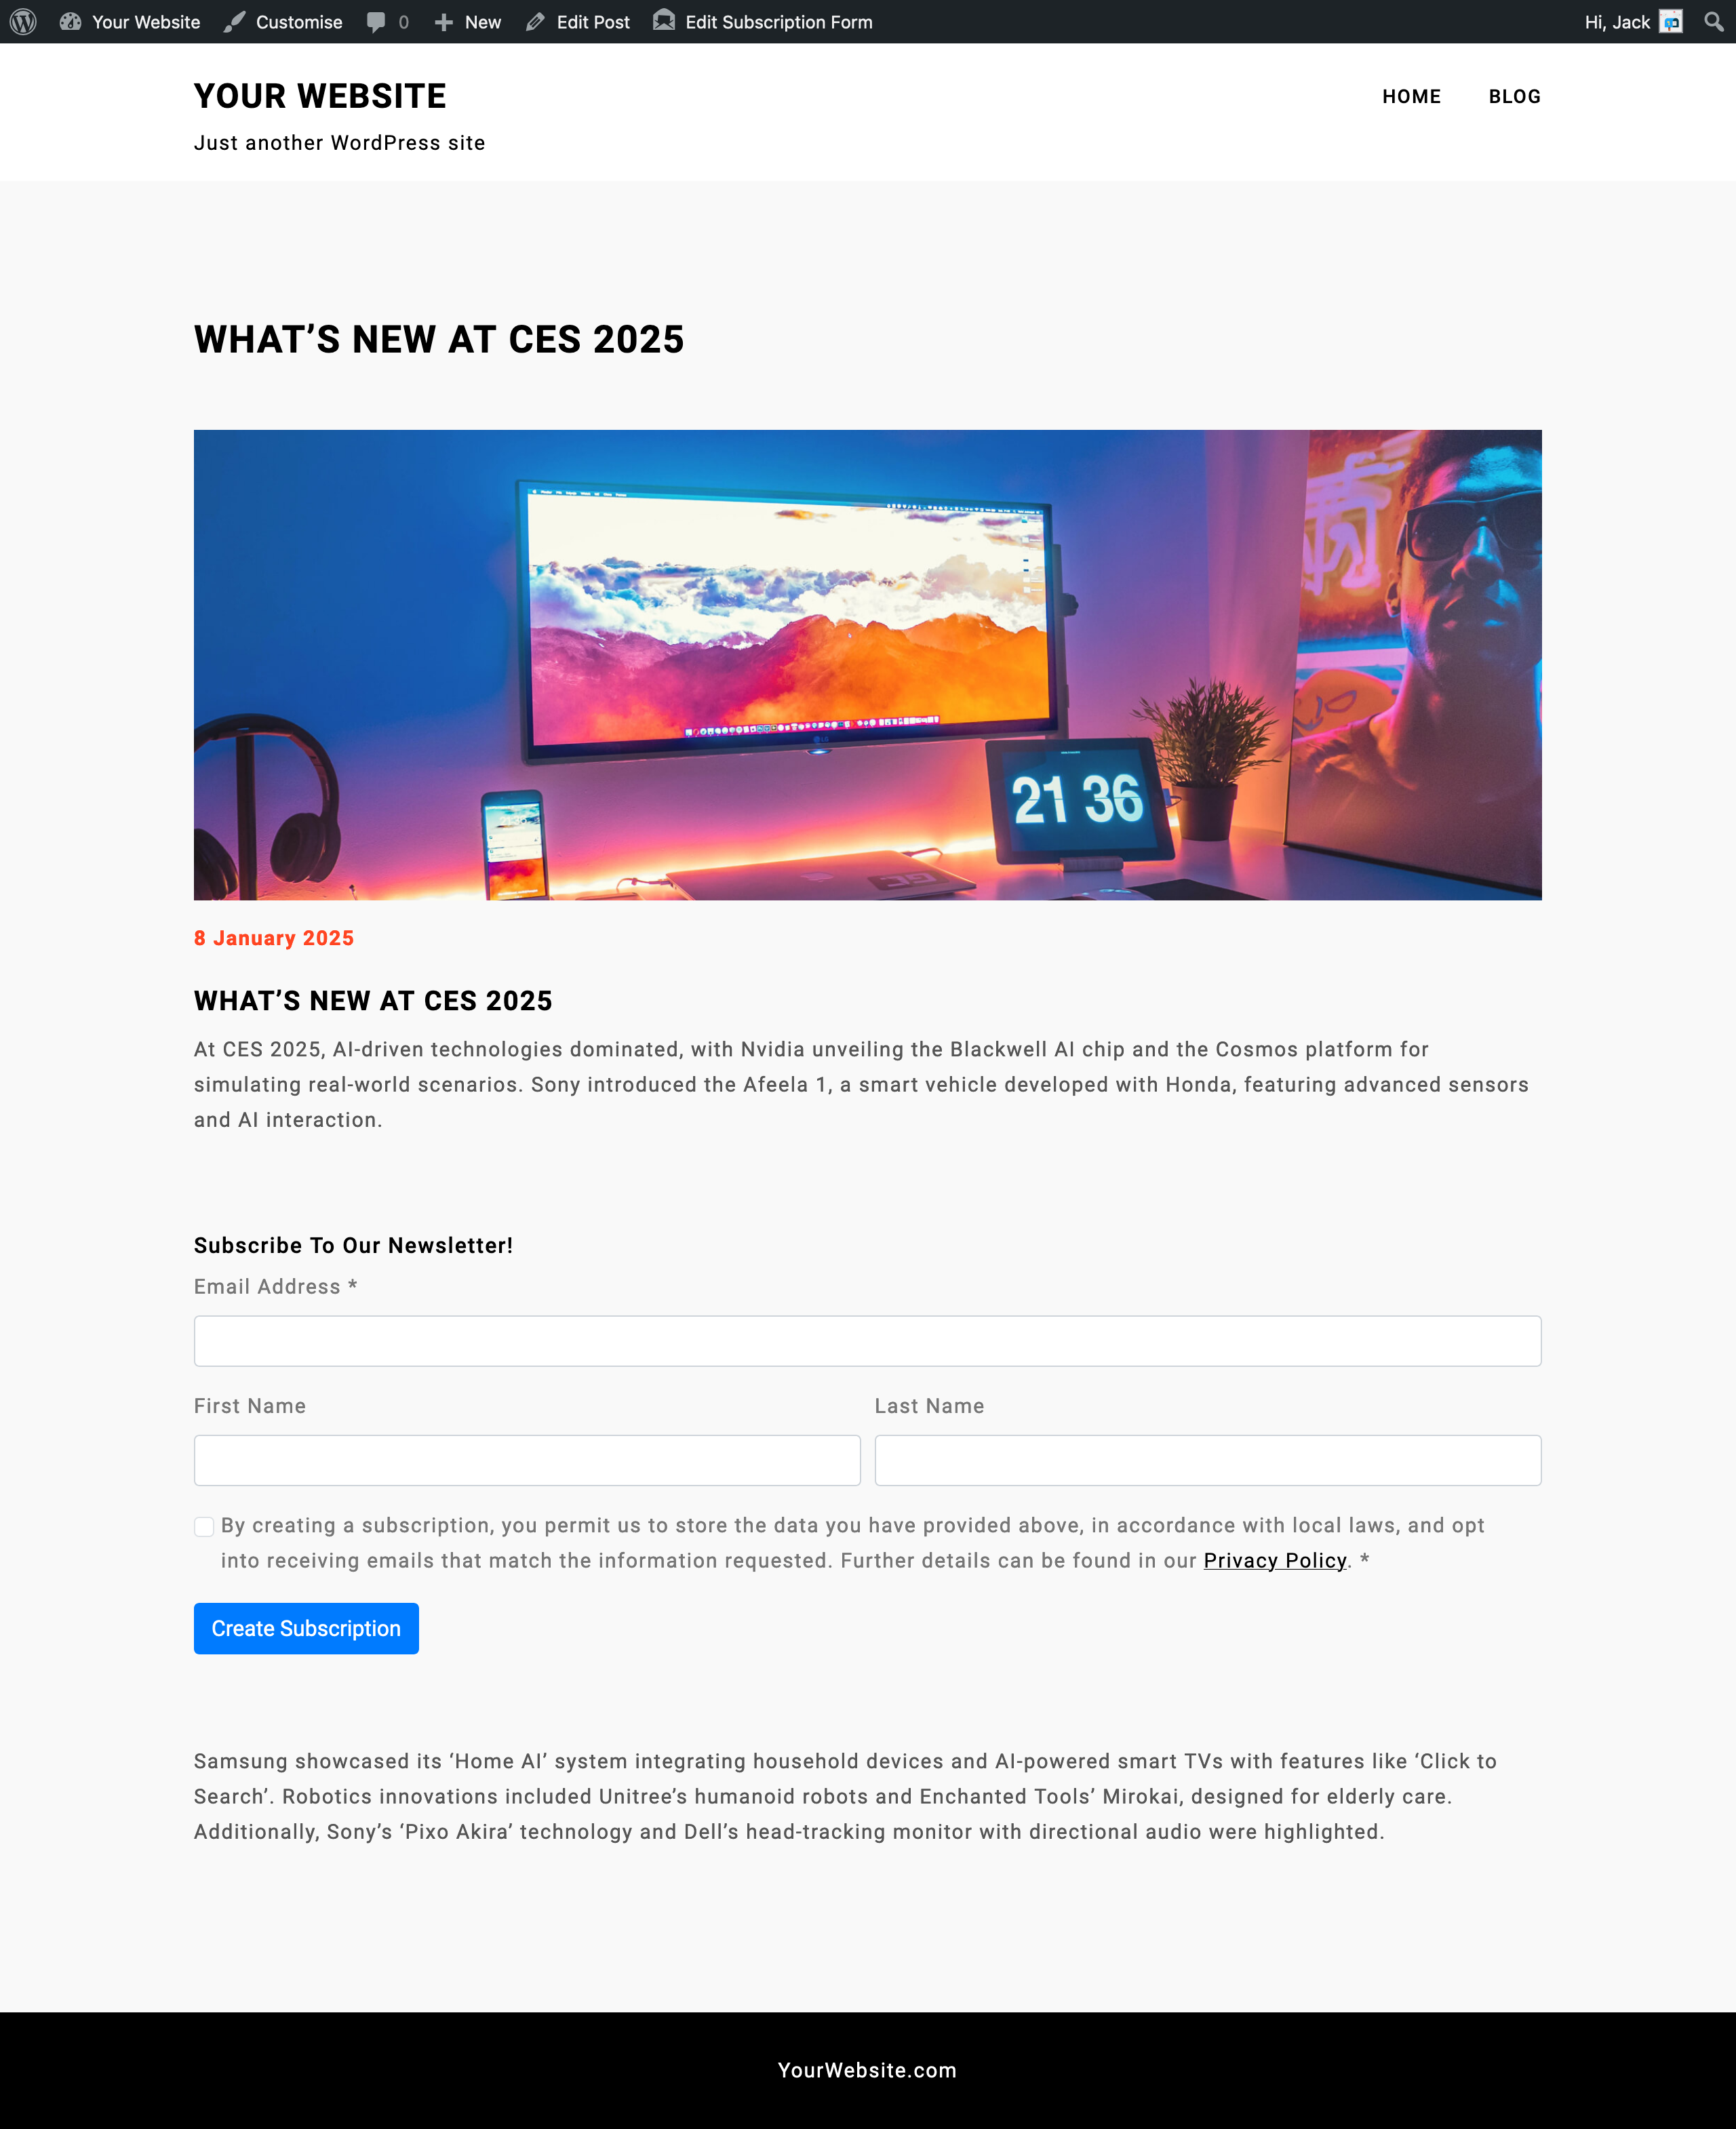
Click the ‘Save’ button and then when the page reloads, you’ll be presented with a shortcode on the right side of the screen that you can easily copy so you can place your new newsletter form wherever you like.
Adding Your Newsletter Form to Your Website
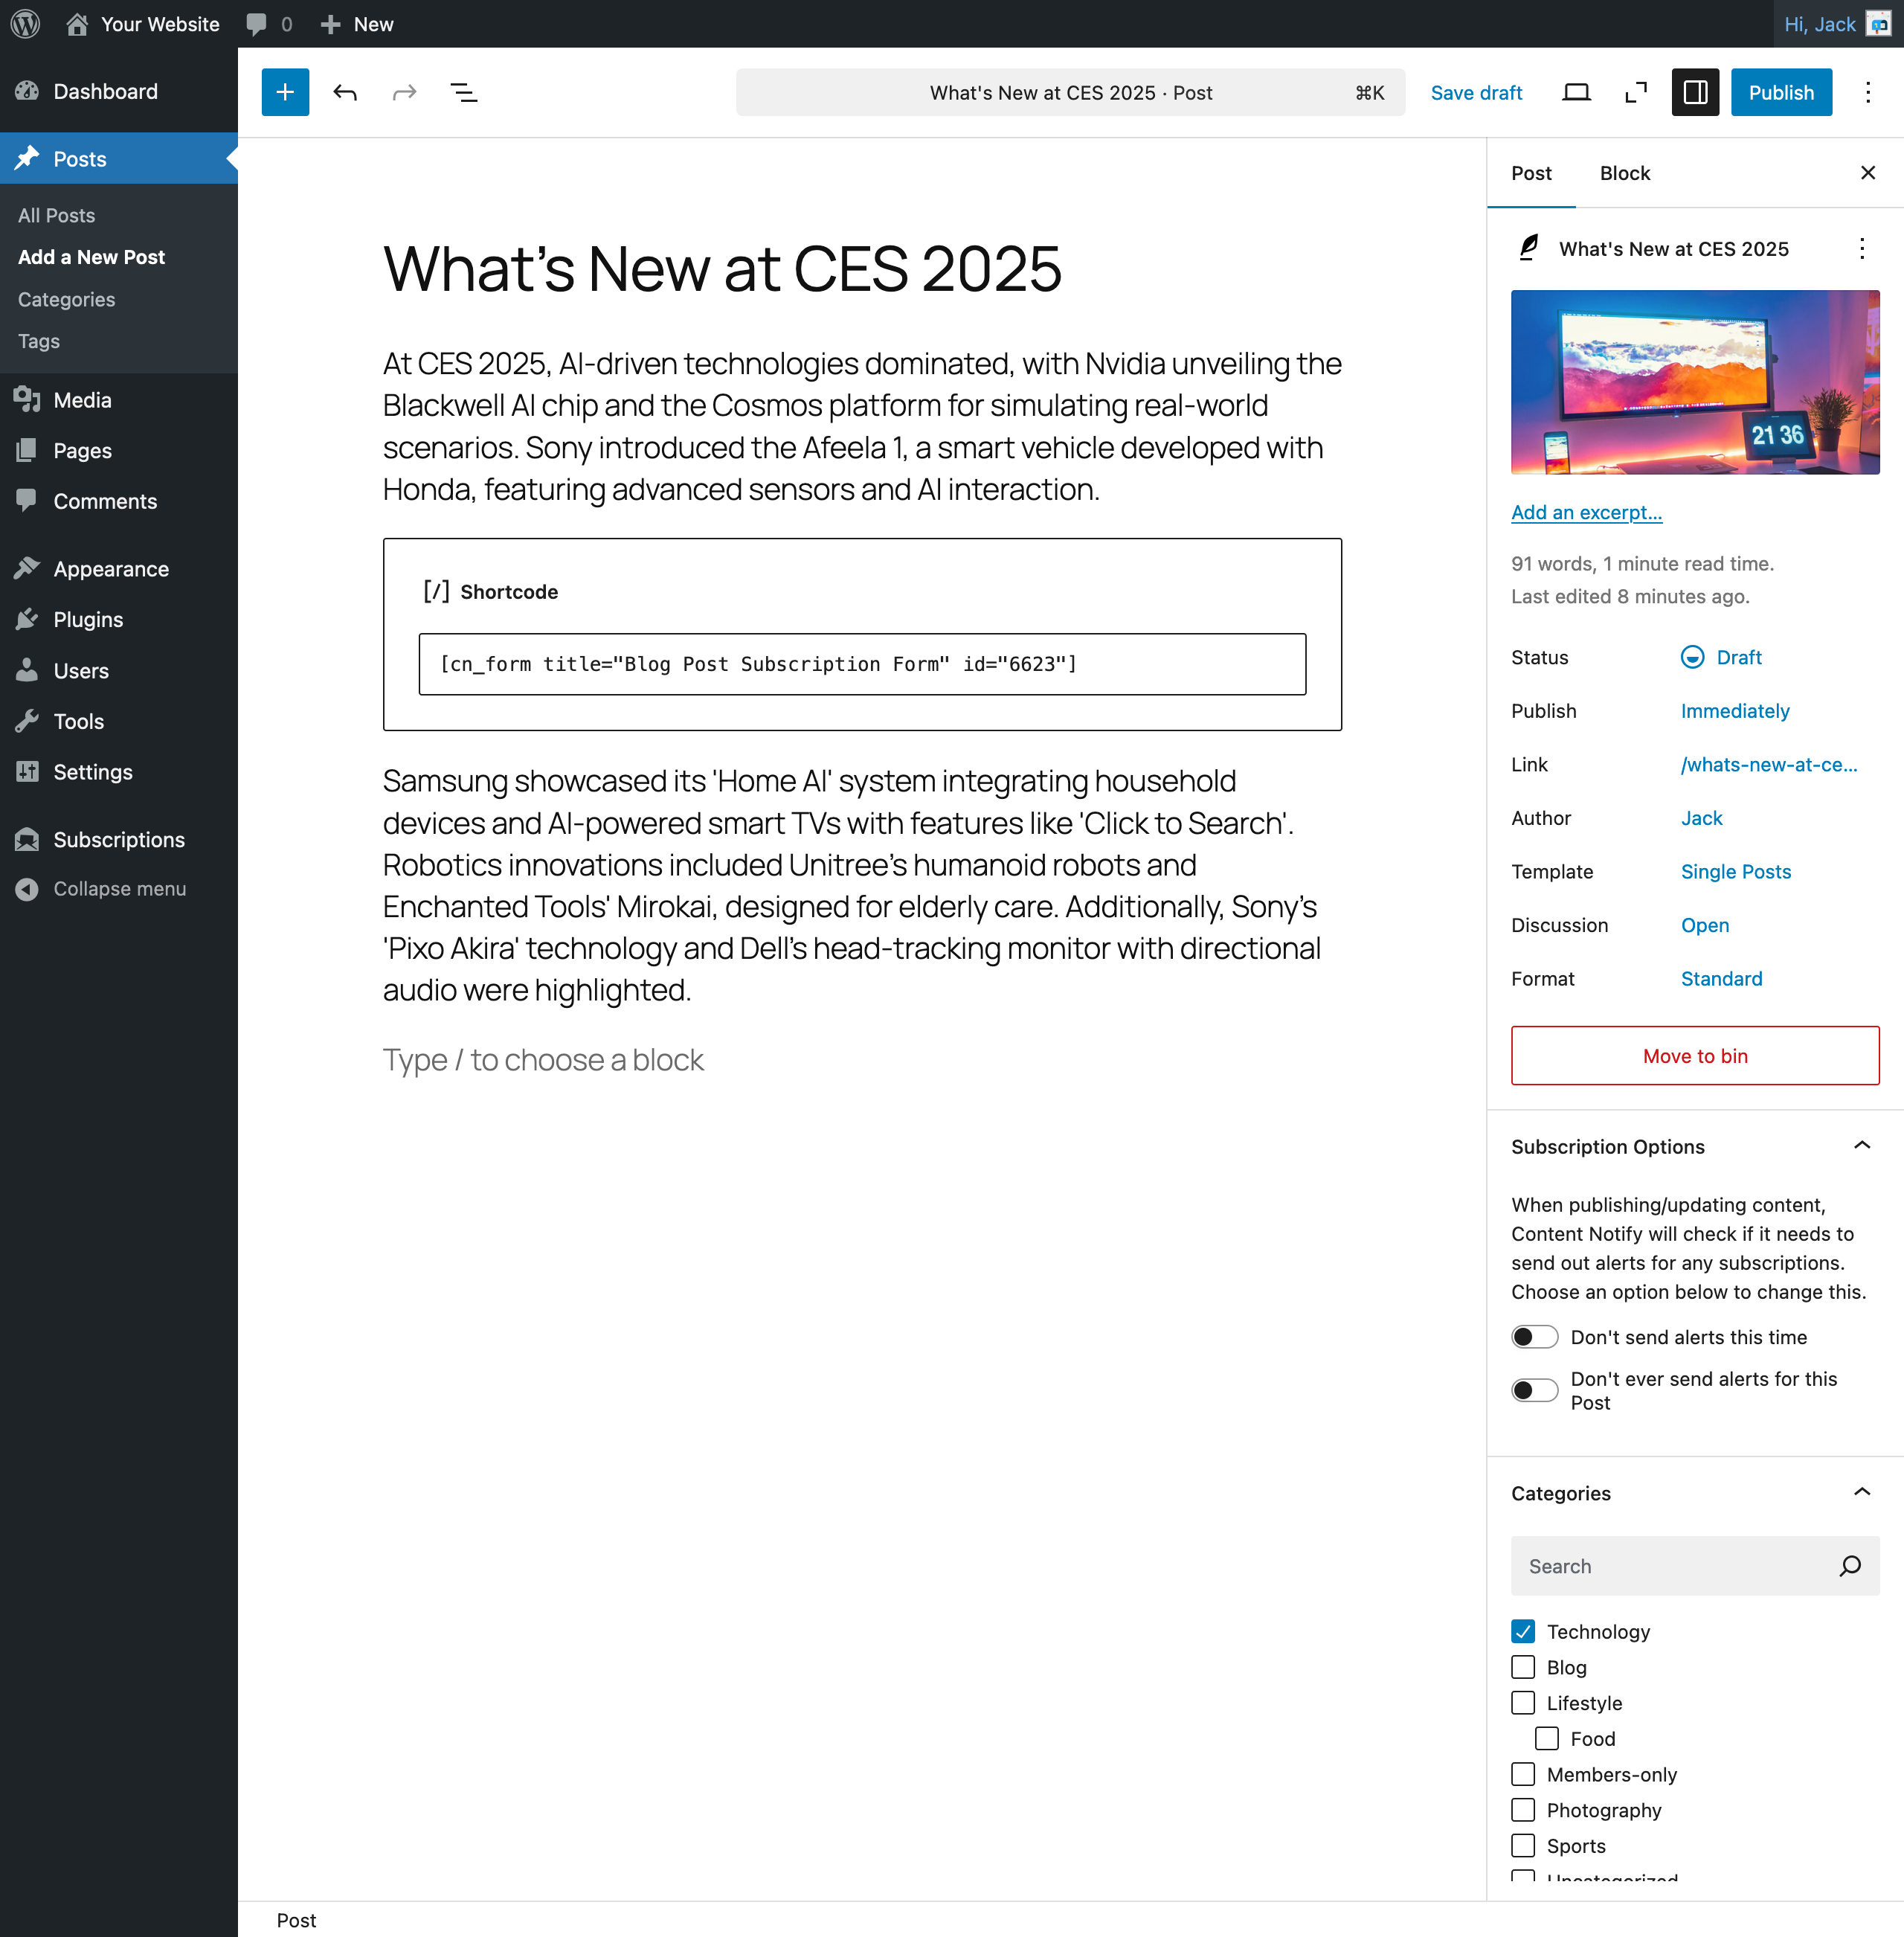
If you’re using the Block Editor, you can use a ‘Shortcode’ block to insert a sign-up form into the middle of a blog post, or if you’re using a theme with Full Site Editing, or a page builder, such as Elementor, you can insert it in a Shortcode Widget and add it to the bottom of all blog pages, or in the footer of your site.
Your First Subscriber
With any luck, it won’t be long before you receive a subscriber through your newsletter sign-up form. When this happens they’ll need to verify their email address first by clicking the Verify link in the email that’s sent to them immediately after signing up. Once verified, they’ll start receiving email alerts as soon as you publish a new post (or later, depending on if they’ve chosen a different frequency).
Your First Newsletter
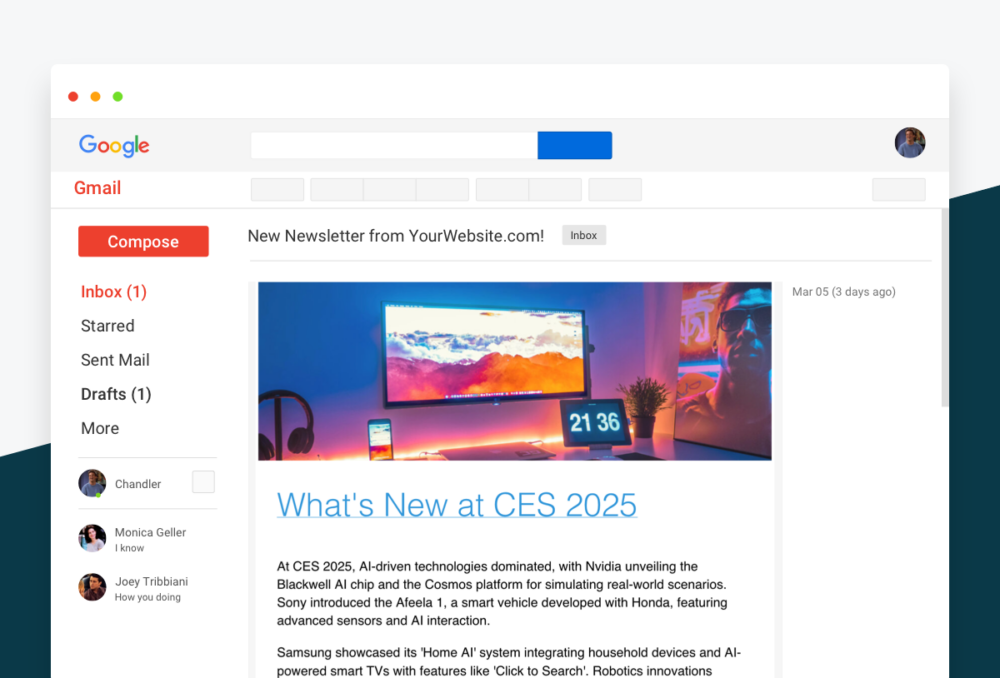
As soon as you publish a new post, email alerts will be generated by Content Notify and sent directly to each subscriber. All email alerts are sent using an HTML template and, if you’ve filled out some of the settings, namely the Subscriptions > Settings > Sending section of the plugin, then your subscribers will see your logo at the top of the emails and business details (for legal purposes) at the bottom too.
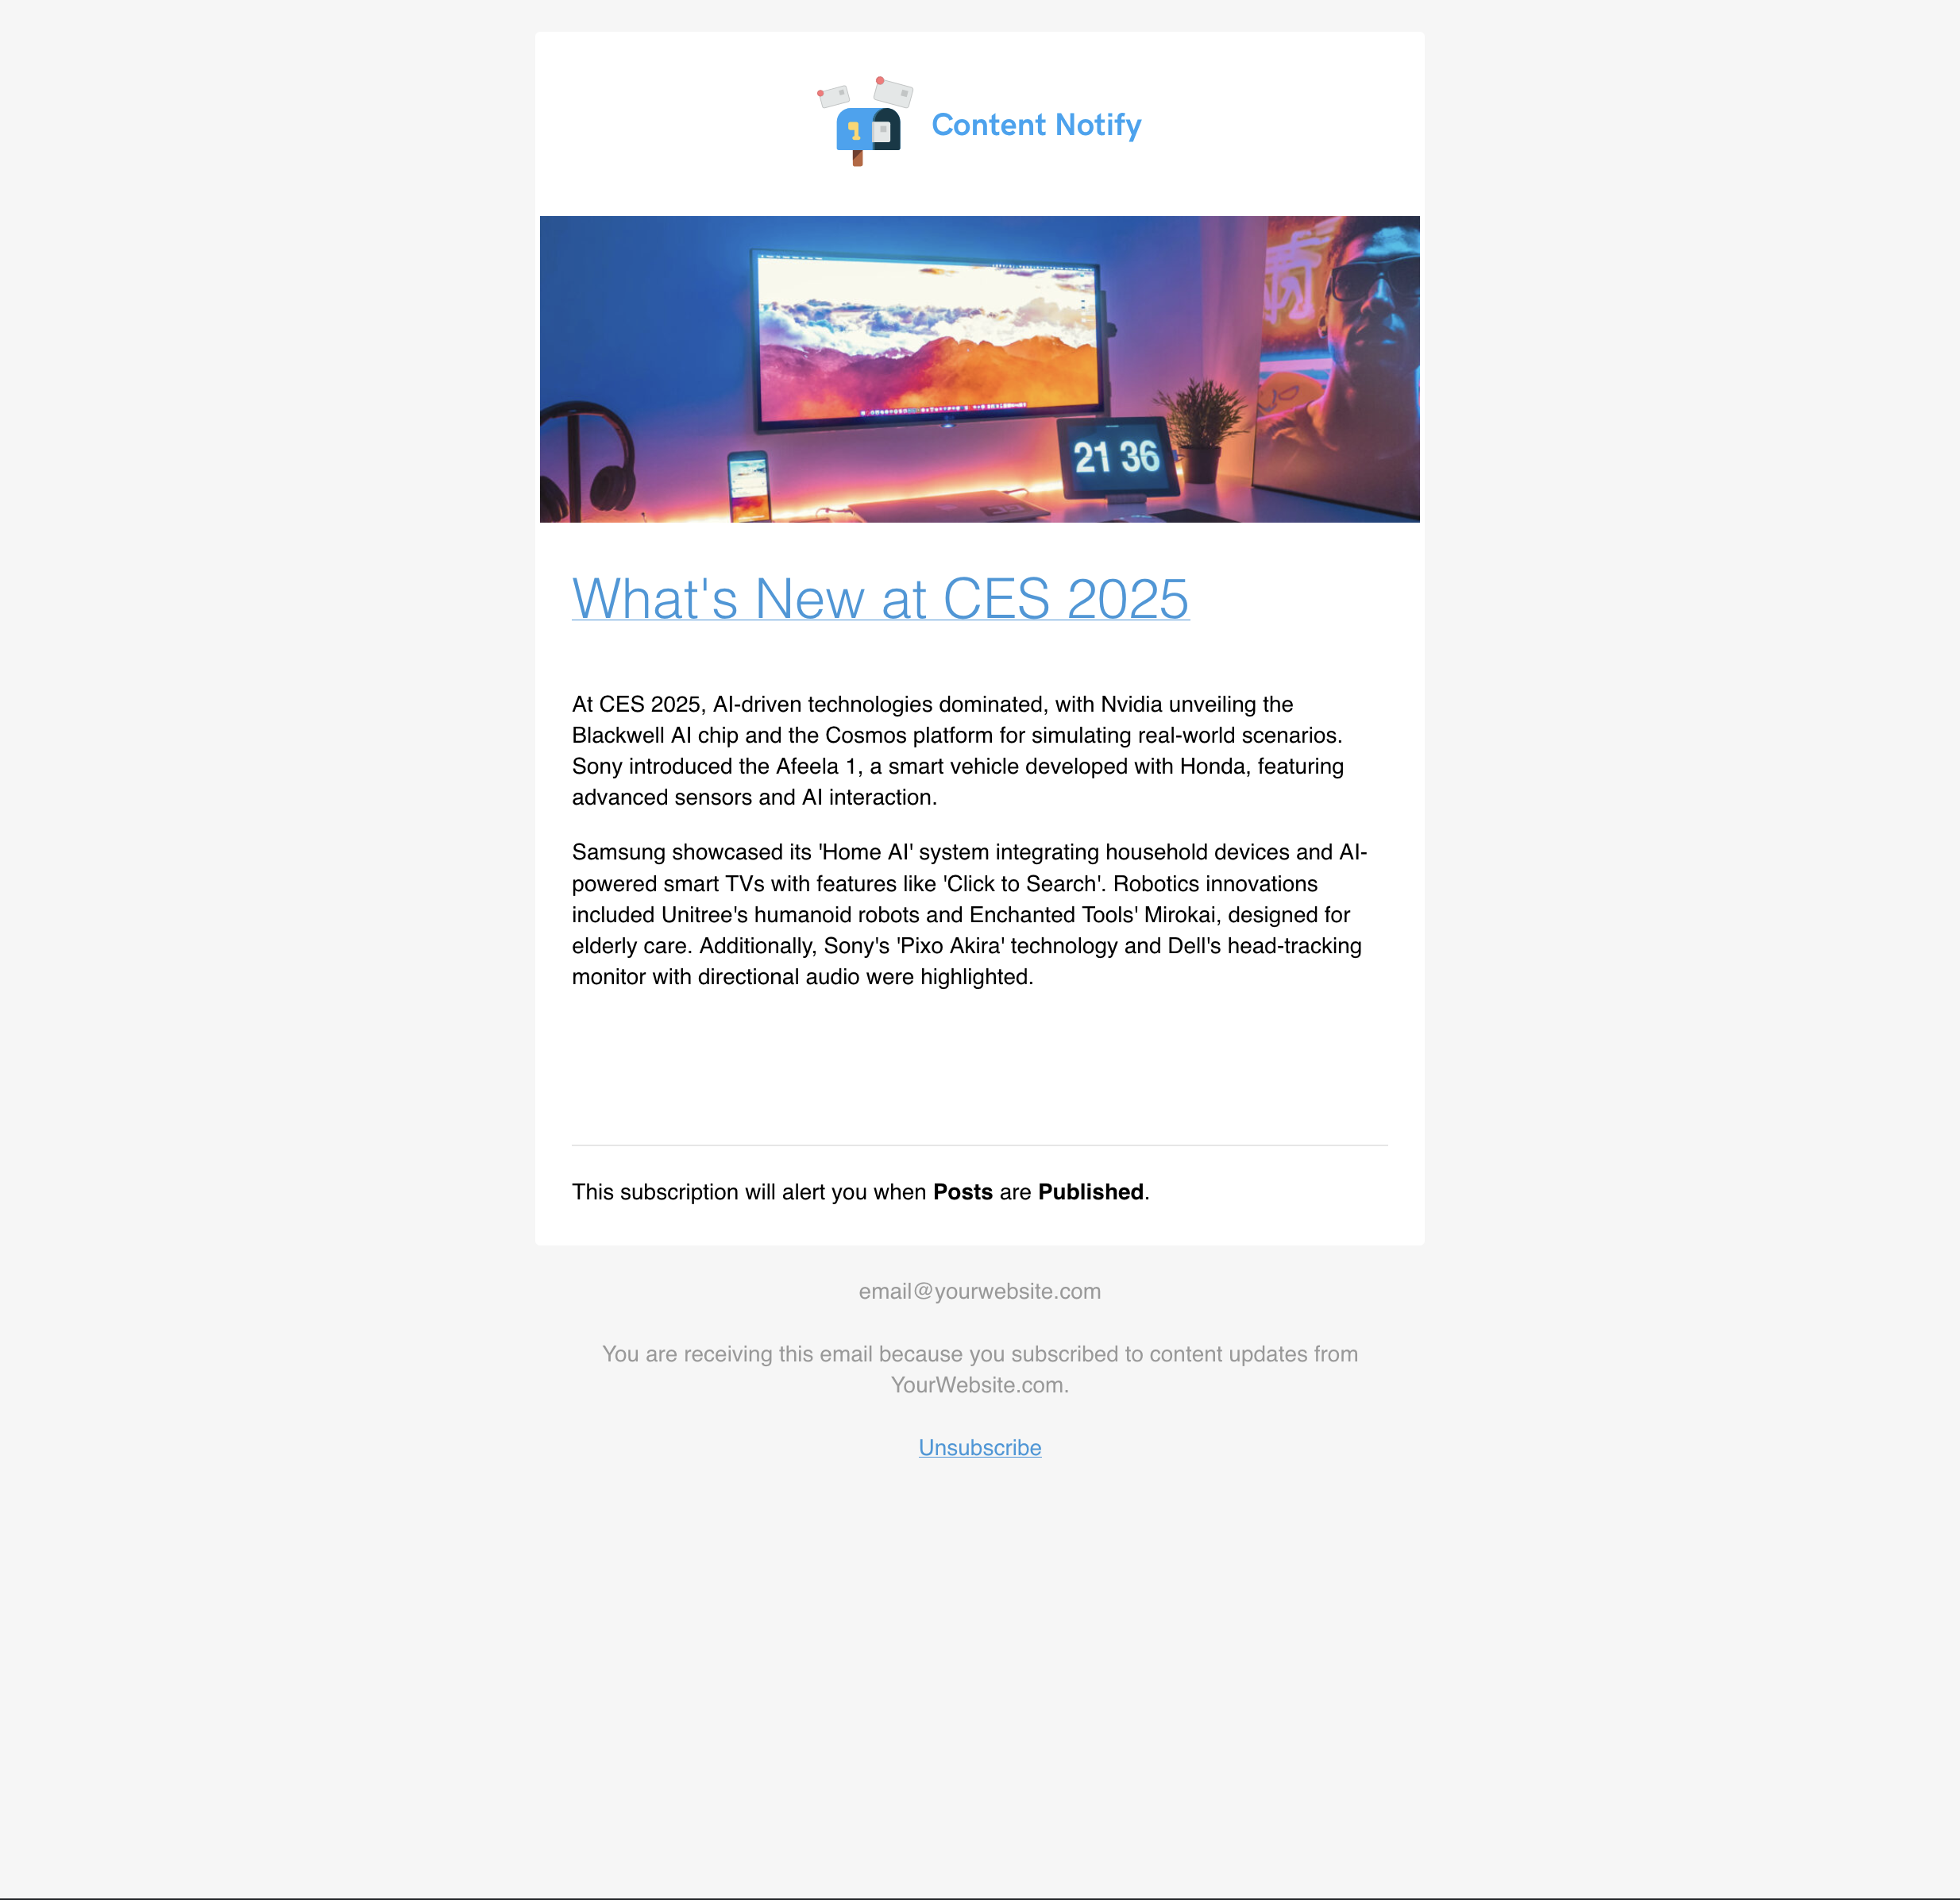
And just like all good newsletters, each post, and an archive of previous posts, can be easily viewed as it’s being hosted on your own WordPress website!
Managing Subscribers & Unsubscribing
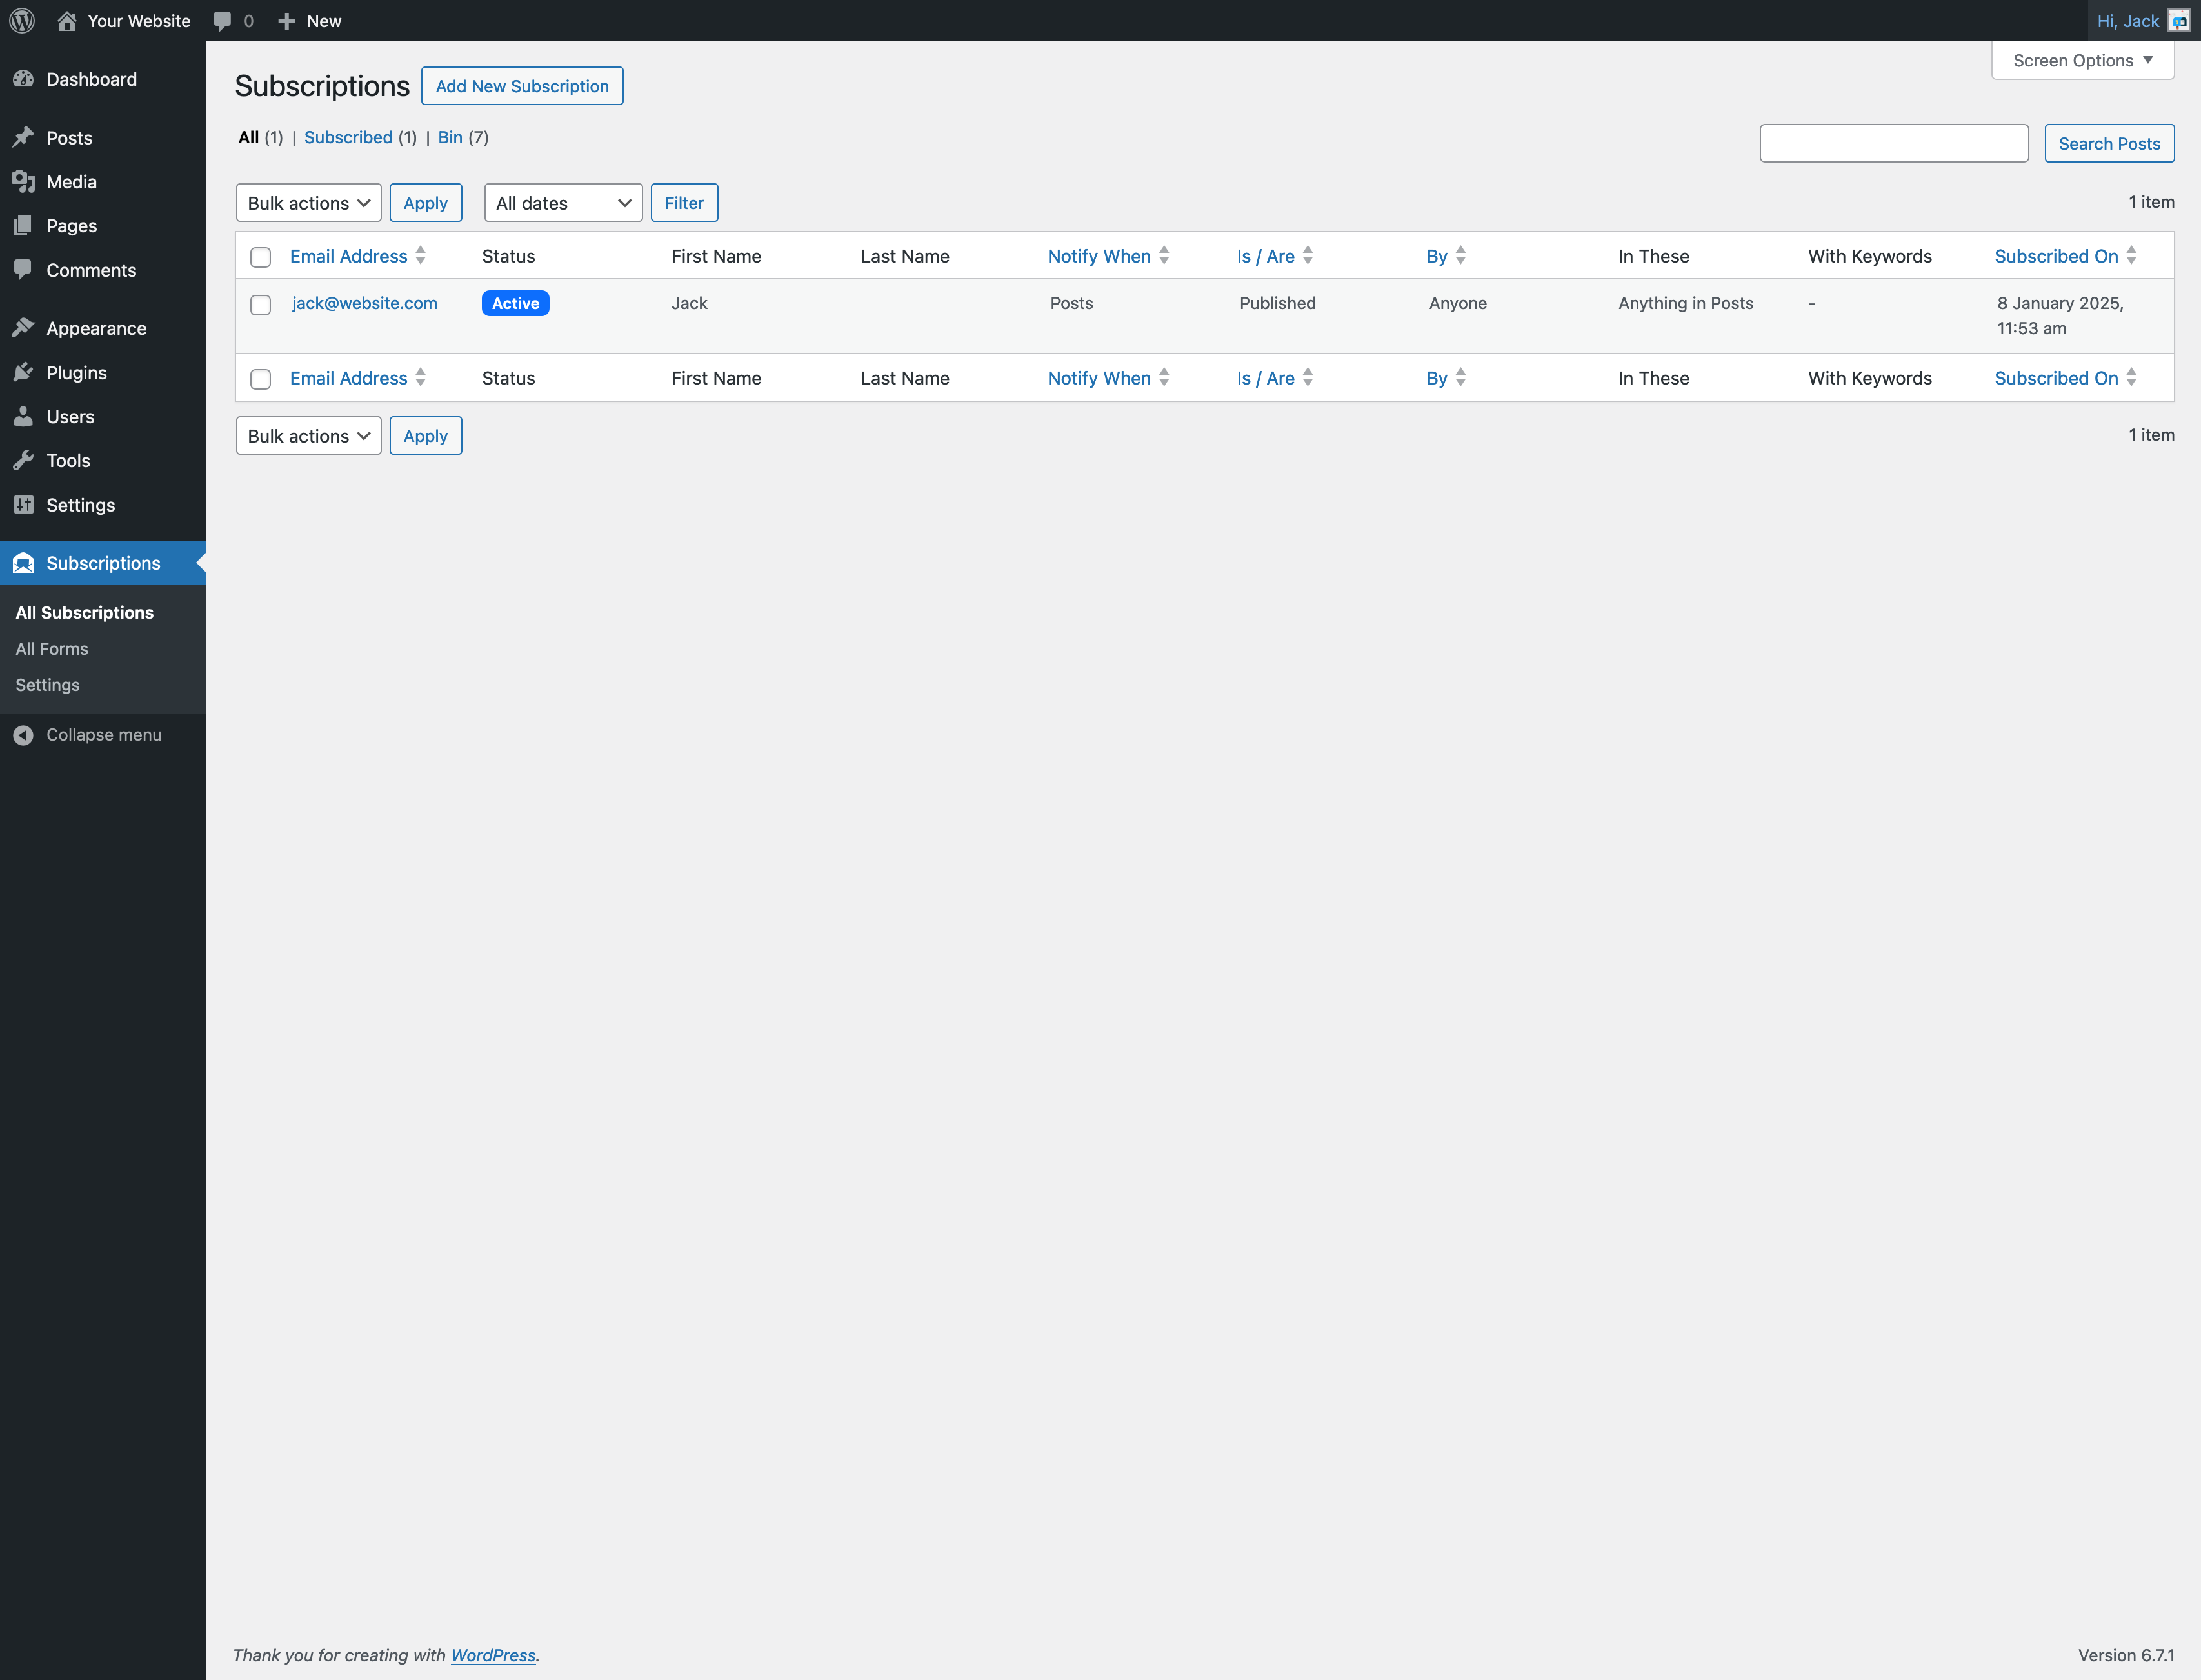
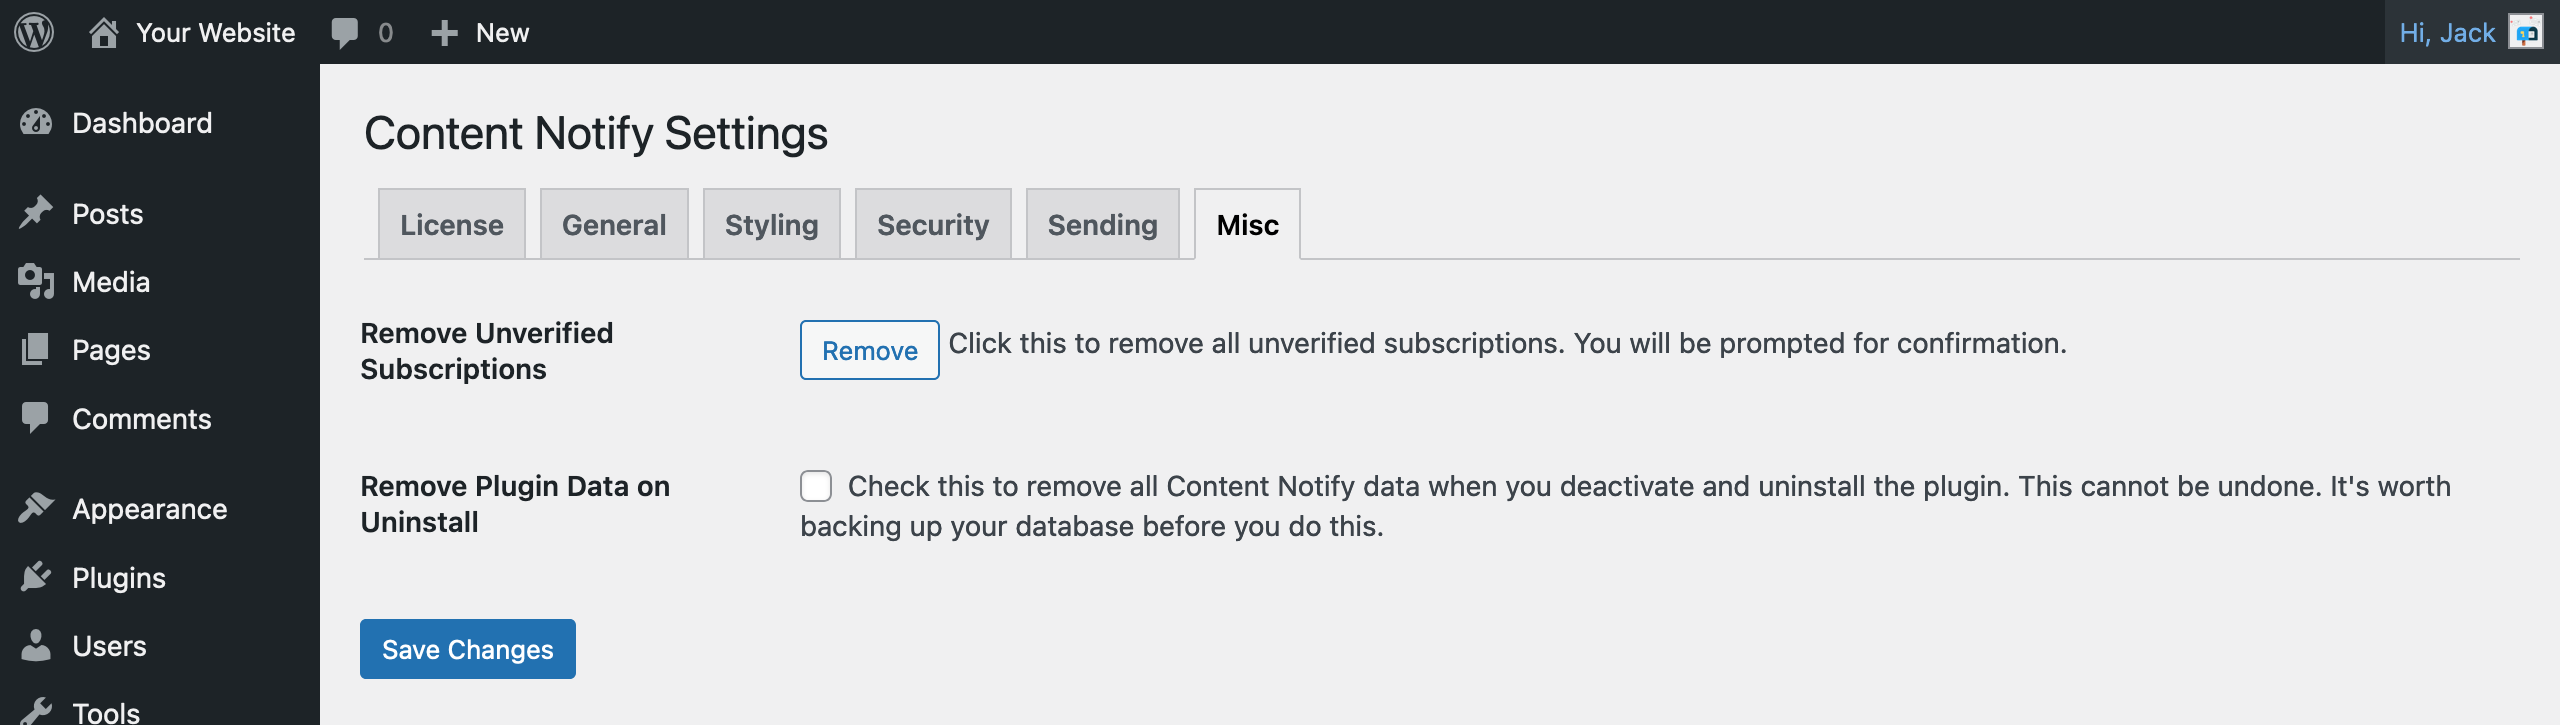
If, all things going well, you receive a lot of subscribers then you may wish to periodically clean them up or remove some manually every once in a while – for example, you may see email alerts bouncing from a specific email address, or some subscribers haven’t verified their email address after a certain amount of time so you want to remove them. With Content Notify, subscription management is easy – all the subscribers are stored in the WP Admin so you can easily view, edit, and delete a subscriber just like any other piece of content, and if you want to cleanup all non-verified subscribers instantly, there’s a handy button for that in Subscriptions > Settings > Misc.
When it comes to subscribers managing themselves, they can easily unsubscribe from the bottom of any email with a single click and if they want to unsubscribe from all their subscriptions at once, or even pause and resume a subscription later, they can do this from the new ‘My Subscriptions’ page, which is created after the plugin is first installed and activated – just remember to add it to a menu, or link to it somewhere to make it easy for your subscribers to access.

What Next?
That’s it! With this set-up you can easily create a super simple newsletter where you can publish your content, let people sign up to it, deliver it to them via email, and let them manage their own subscriptions – all via your own WordPress website.
If you want to take things a step further, you can customise your email template that’s sent, adding more styling, and a bit more of your branding, to take your newsletter to the next level.
Subscribe to new blog posts
(Yes, this form is using Content Notify)
Start using it today
Ready to transform your communications for your
visitors, members, subscribers, and users?
14-DAY MONEY BACK GUARANTEE
ON NEW PURCHASES